Back in Stock: How to Set Up
Let customers subscribe to email alerts when an out-of-stock product becomes available again. Create a campaign, customize the button and popup that appear on your storefront, draft the restock email, and pick the products to cover.
Back in Stock and Pre-Order are two separate features. Back in Stock captures emails on out-of-stock products and notifies subscribers when inventory returns. Pre-Order lets customers buy out-of-stock products immediately with a deposit or full payment. You can run both on the same store.
What it does
When a customer visits a product page and the variant is out of stock, the app shows a Notify me when available button. Clicking it opens a popup, the customer enters their email, and the app stores the subscription. When you restock the product (or click Send now from the Notifications report), every waiting subscriber receives a branded email with a one-click link back to the product.
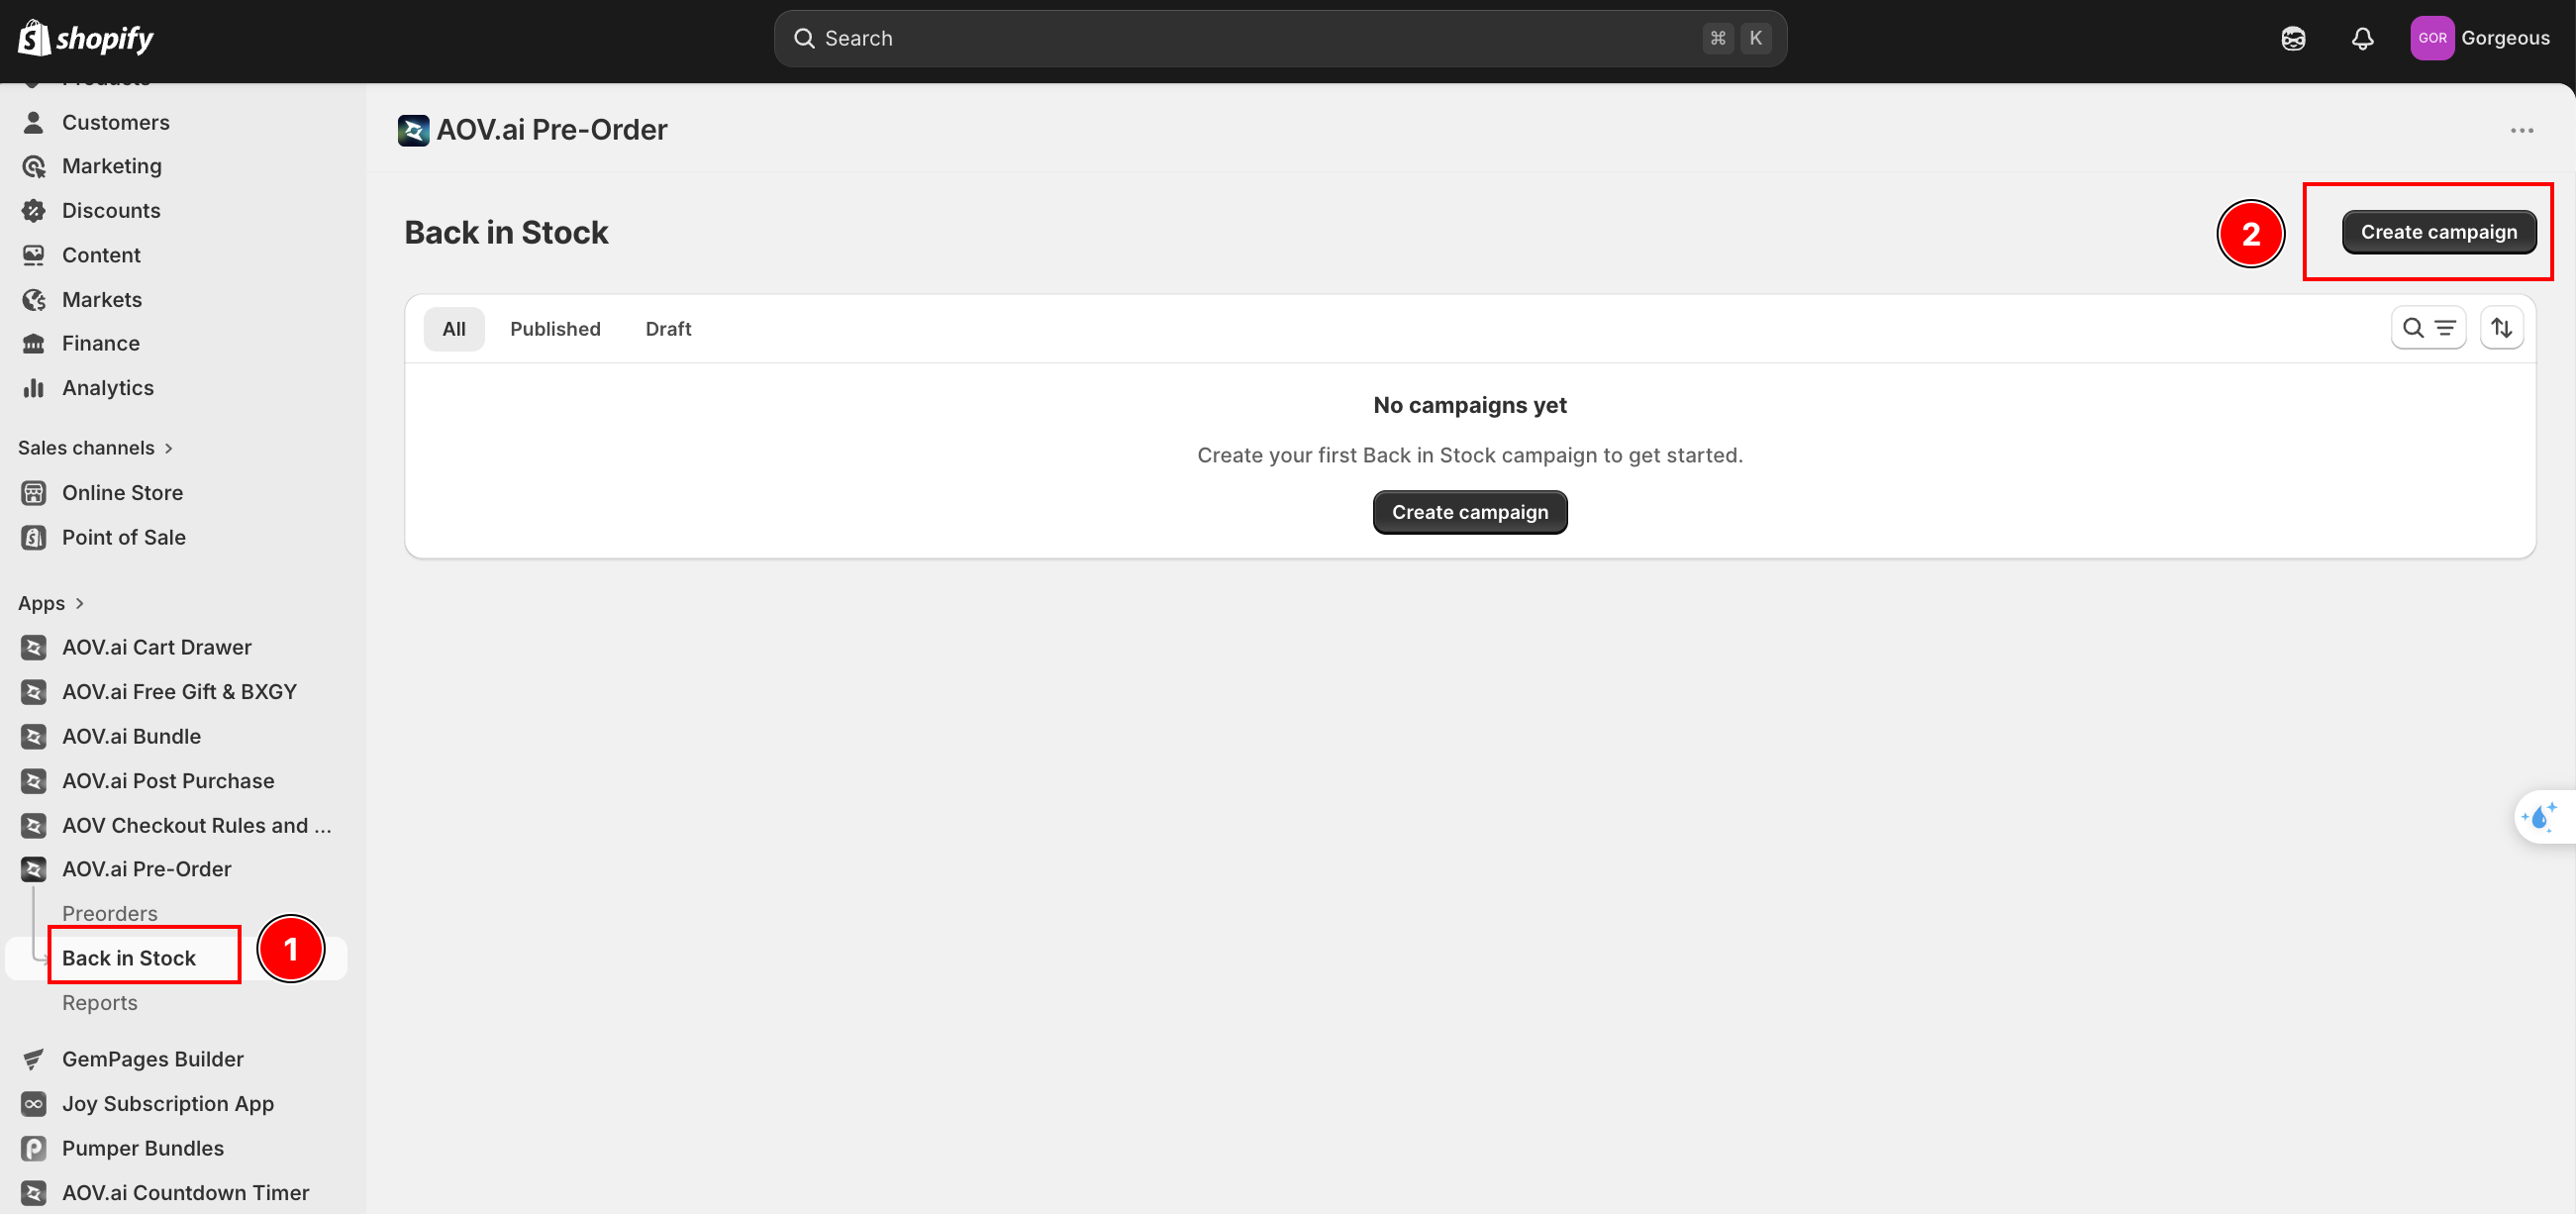
The flow has 3 moving parts:
- A campaign that holds the button text, popup copy, email template, and product list
- The storefront widget that renders the button and popup (powered by the app embed)
- The Notifications report that lists subscribers and triggers manual sends
Before you start
- Make sure the AOV Preorder app embed is enabled in your theme. Go to Online Store > Themes > Customize > App embeds and toggle it on.
- Decide whether you want to send emails automatically when stock returns, or trigger sends manually from the admin.
Step 1: Create a campaign
Navigate to AOV.ai Pre-Order > Back in Stock, then click Create campaign in the top right. The wizard opens with 4 tabs across the top:
- Notification settings
- Design
- Back in stock products
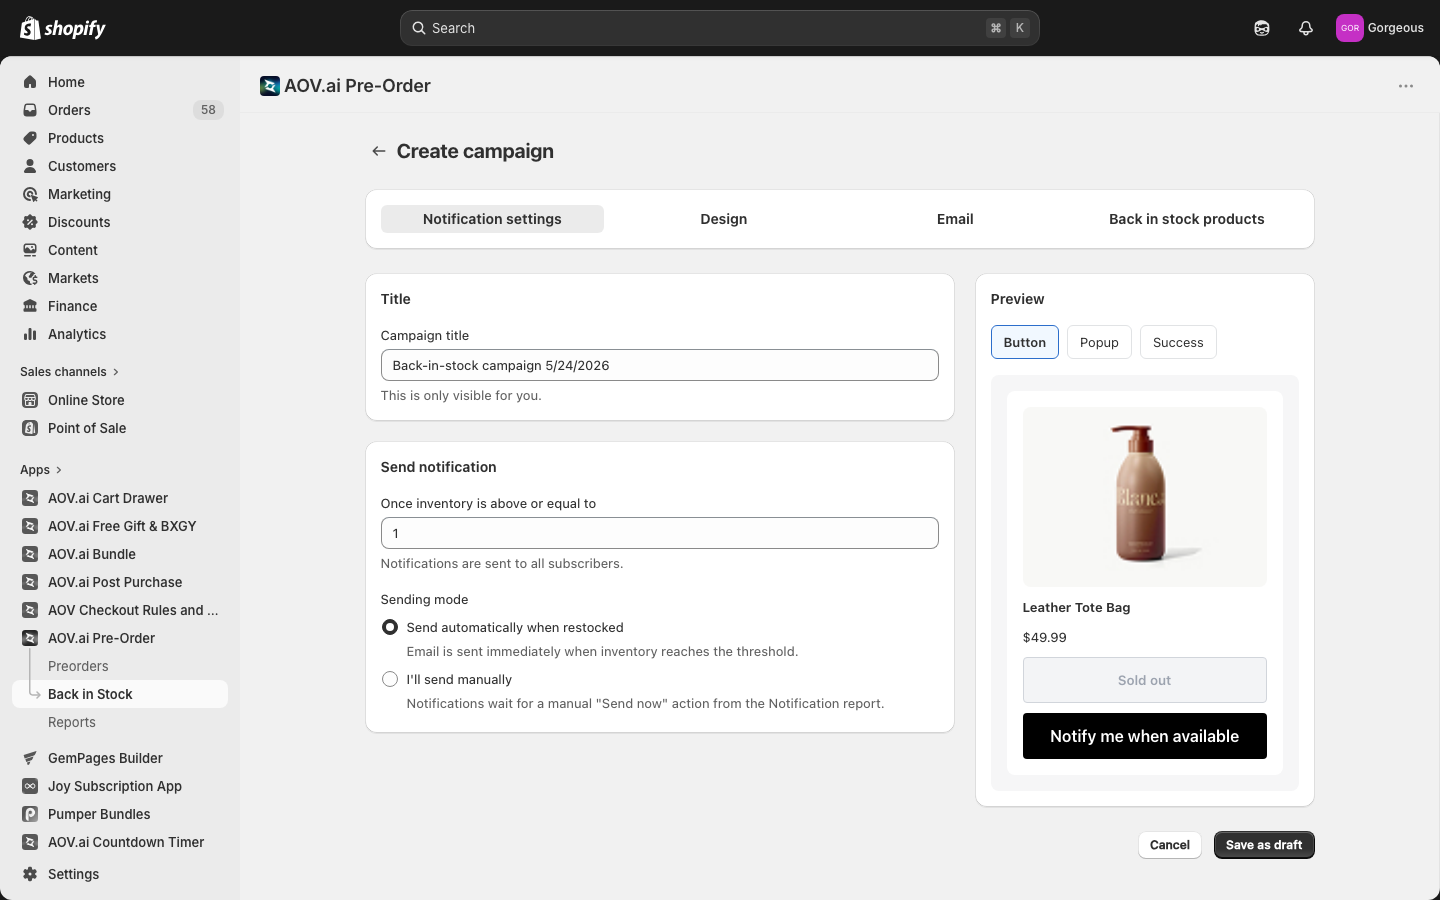
You can move between tabs in any order. The right side of the screen shows a live preview that updates as you edit.
Step 2: Notification settings (Tab 1)
In the Title card, fill in:
- Campaign title: an internal name for the campaign. Help text reads "This is only visible for you."
- Example:
Spring restock waitlist
- Example:
In the Send notification card:
- Once inventory is above or equal to: the inventory threshold that triggers the automatic email. Default is
1. Help text reads "Notifications are sent to all subscribers." - Sending mode: pick one
- Send automatically when restocked: "Email is sent immediately when inventory reaches the threshold."
- I'll send manually: "Notifications wait for a manual 'Send now' action from the Notification report."
Tip: Use Send manually if you batch your restocks across multiple SKUs and want to coordinate the send timing yourself. Use Send automatically for set-and-forget operation.
Step 3: Design (Tab 2)
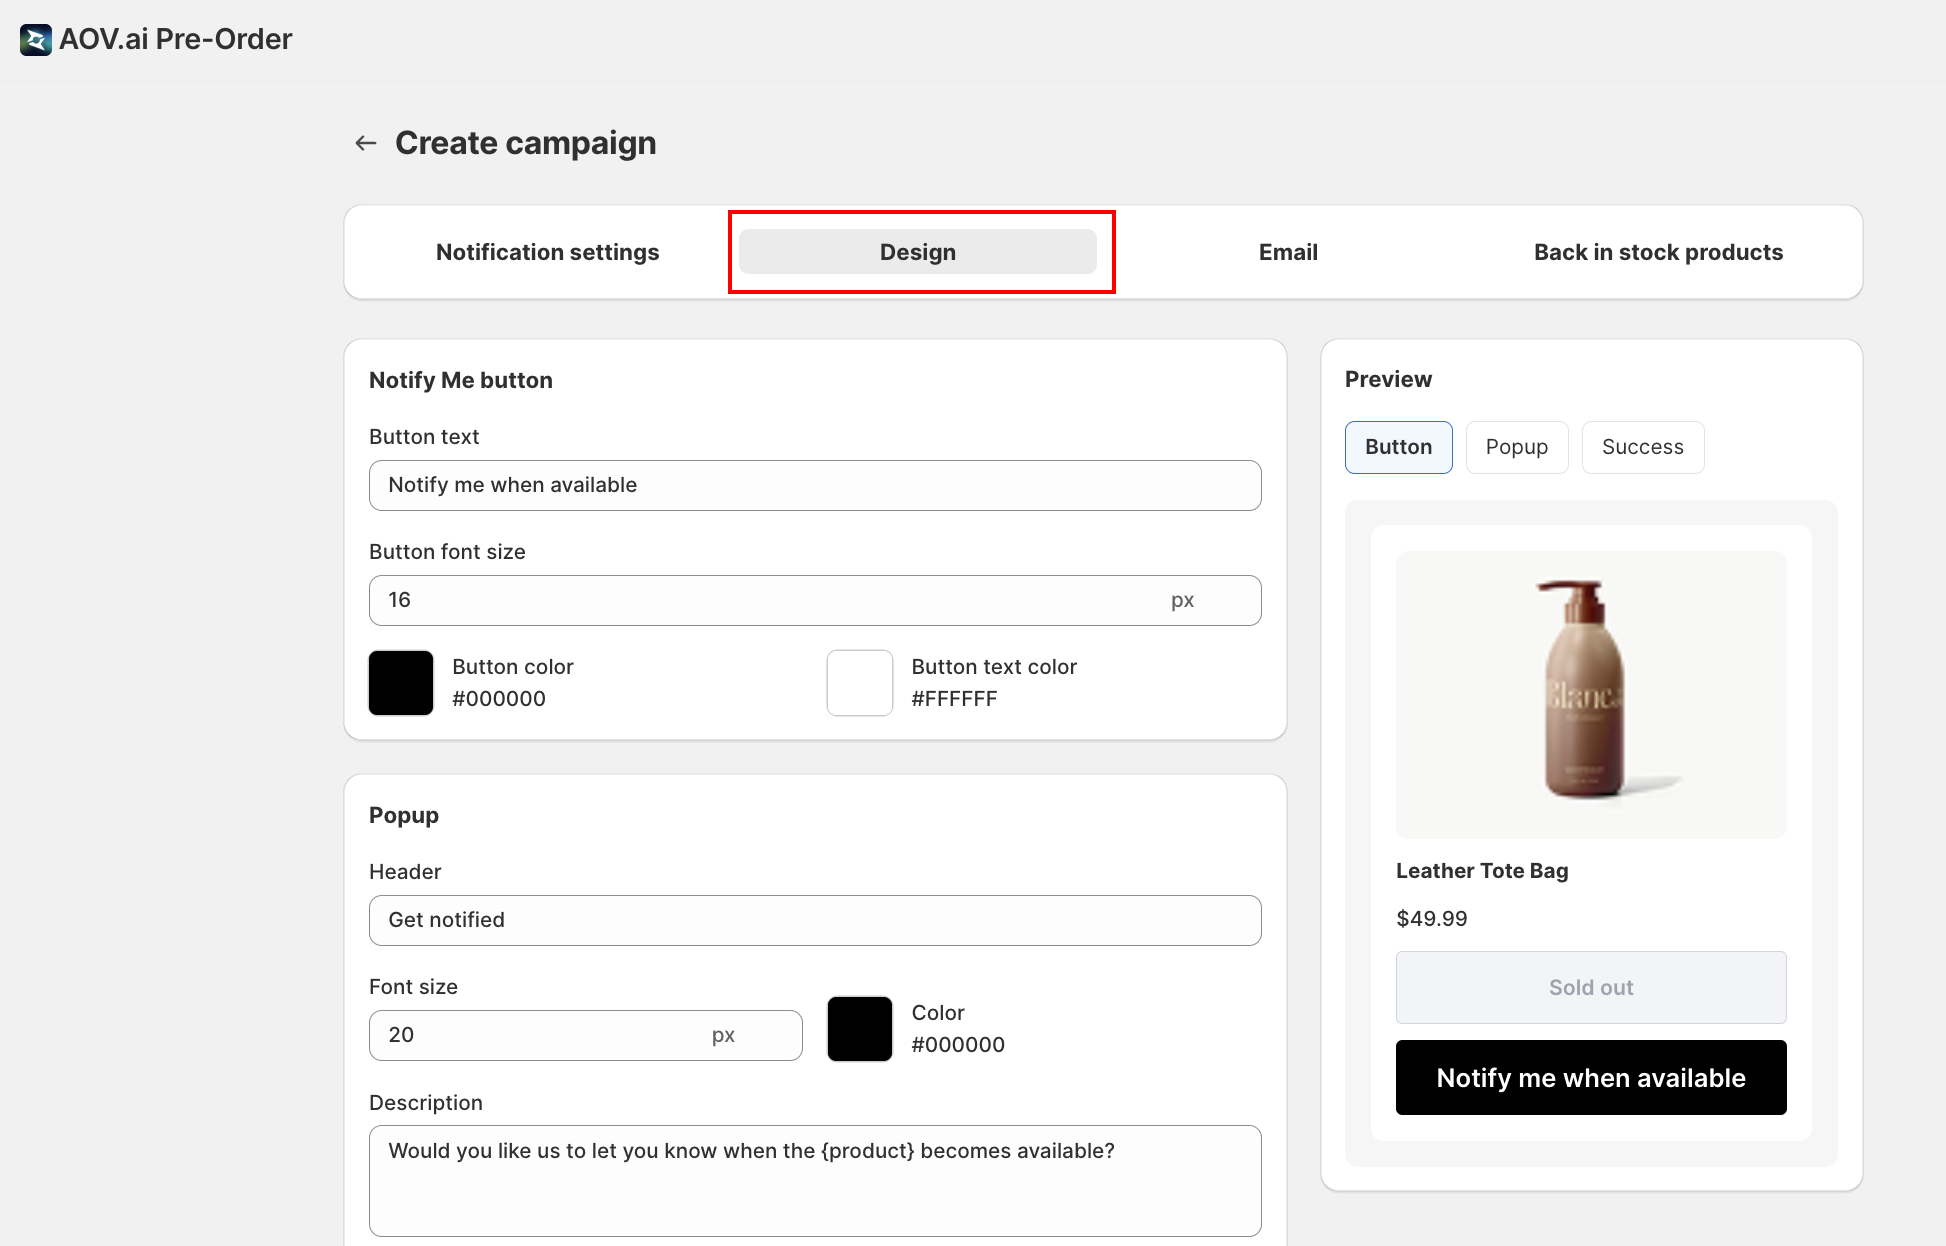
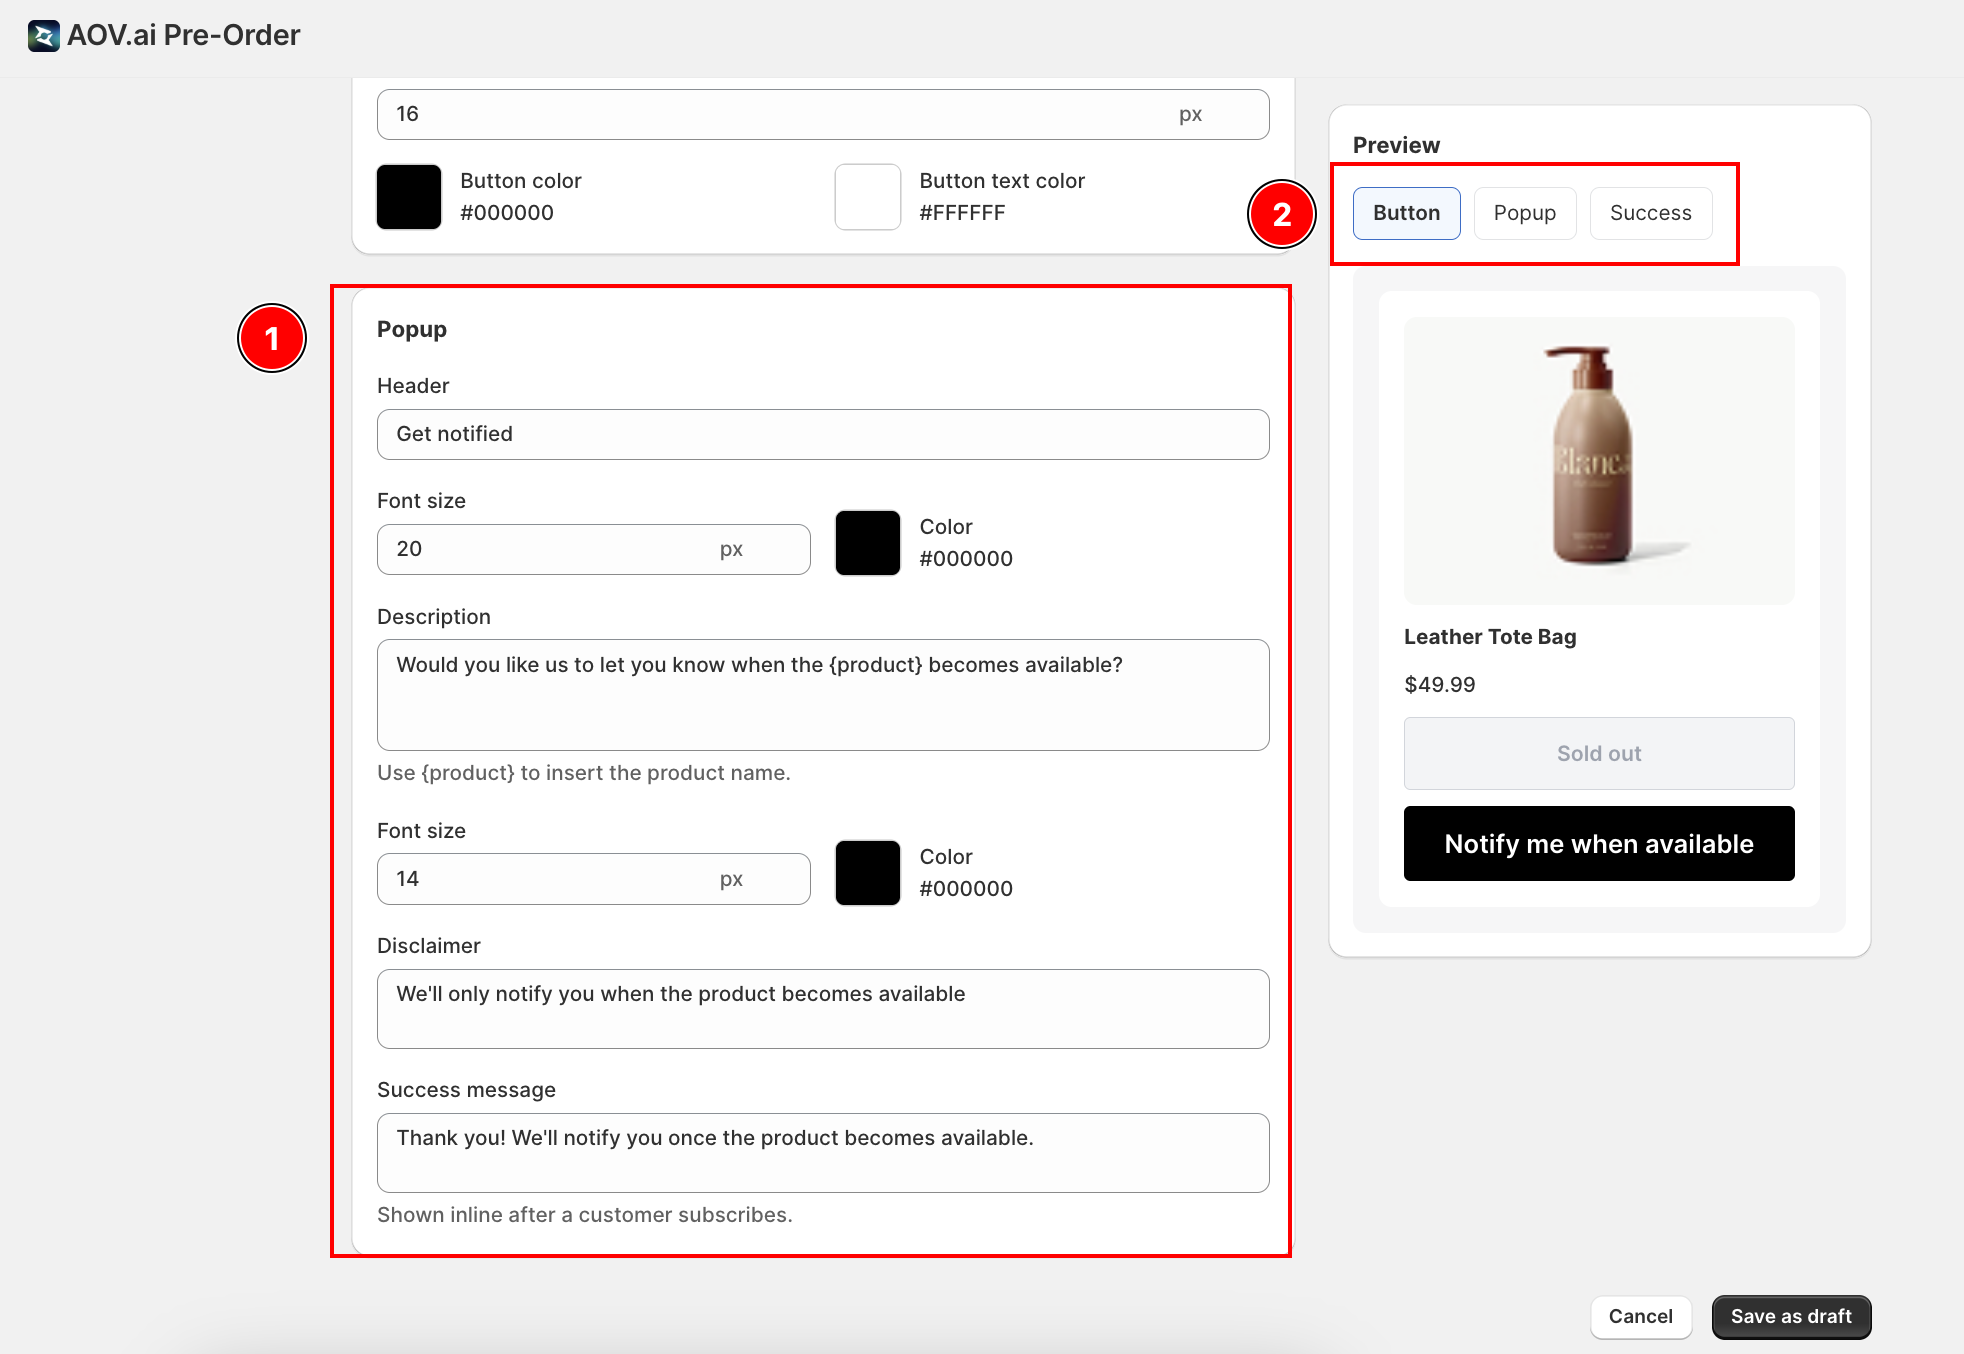
Customize how the storefront button and popup look. The right-hand preview has 3 sub-tabs: Button, Popup, and Success.
Notify Me button
- Button text: default
Notify me when available - Button font size: 10 to 32 px
- Button color and Button text color
Popup
The popup is the modal that opens after a customer clicks the button.
- Header: default
Get notified. Font size and color configurable. - Description: default
Would you like us to let you know when the {product} becomes available?. Use{product}to insert the product name automatically. - Disclaimer: default
We'll only notify you when the product becomes available. Shown below the email field. - Success message: default
Thank you! We'll notify you once the product becomes available.Shown inline after the customer submits.
Step 4: Email (Tab 3)
This tab controls the email subscribers receive when the product is back in stock. The right-side preview shows a mock email frame that updates as you edit.
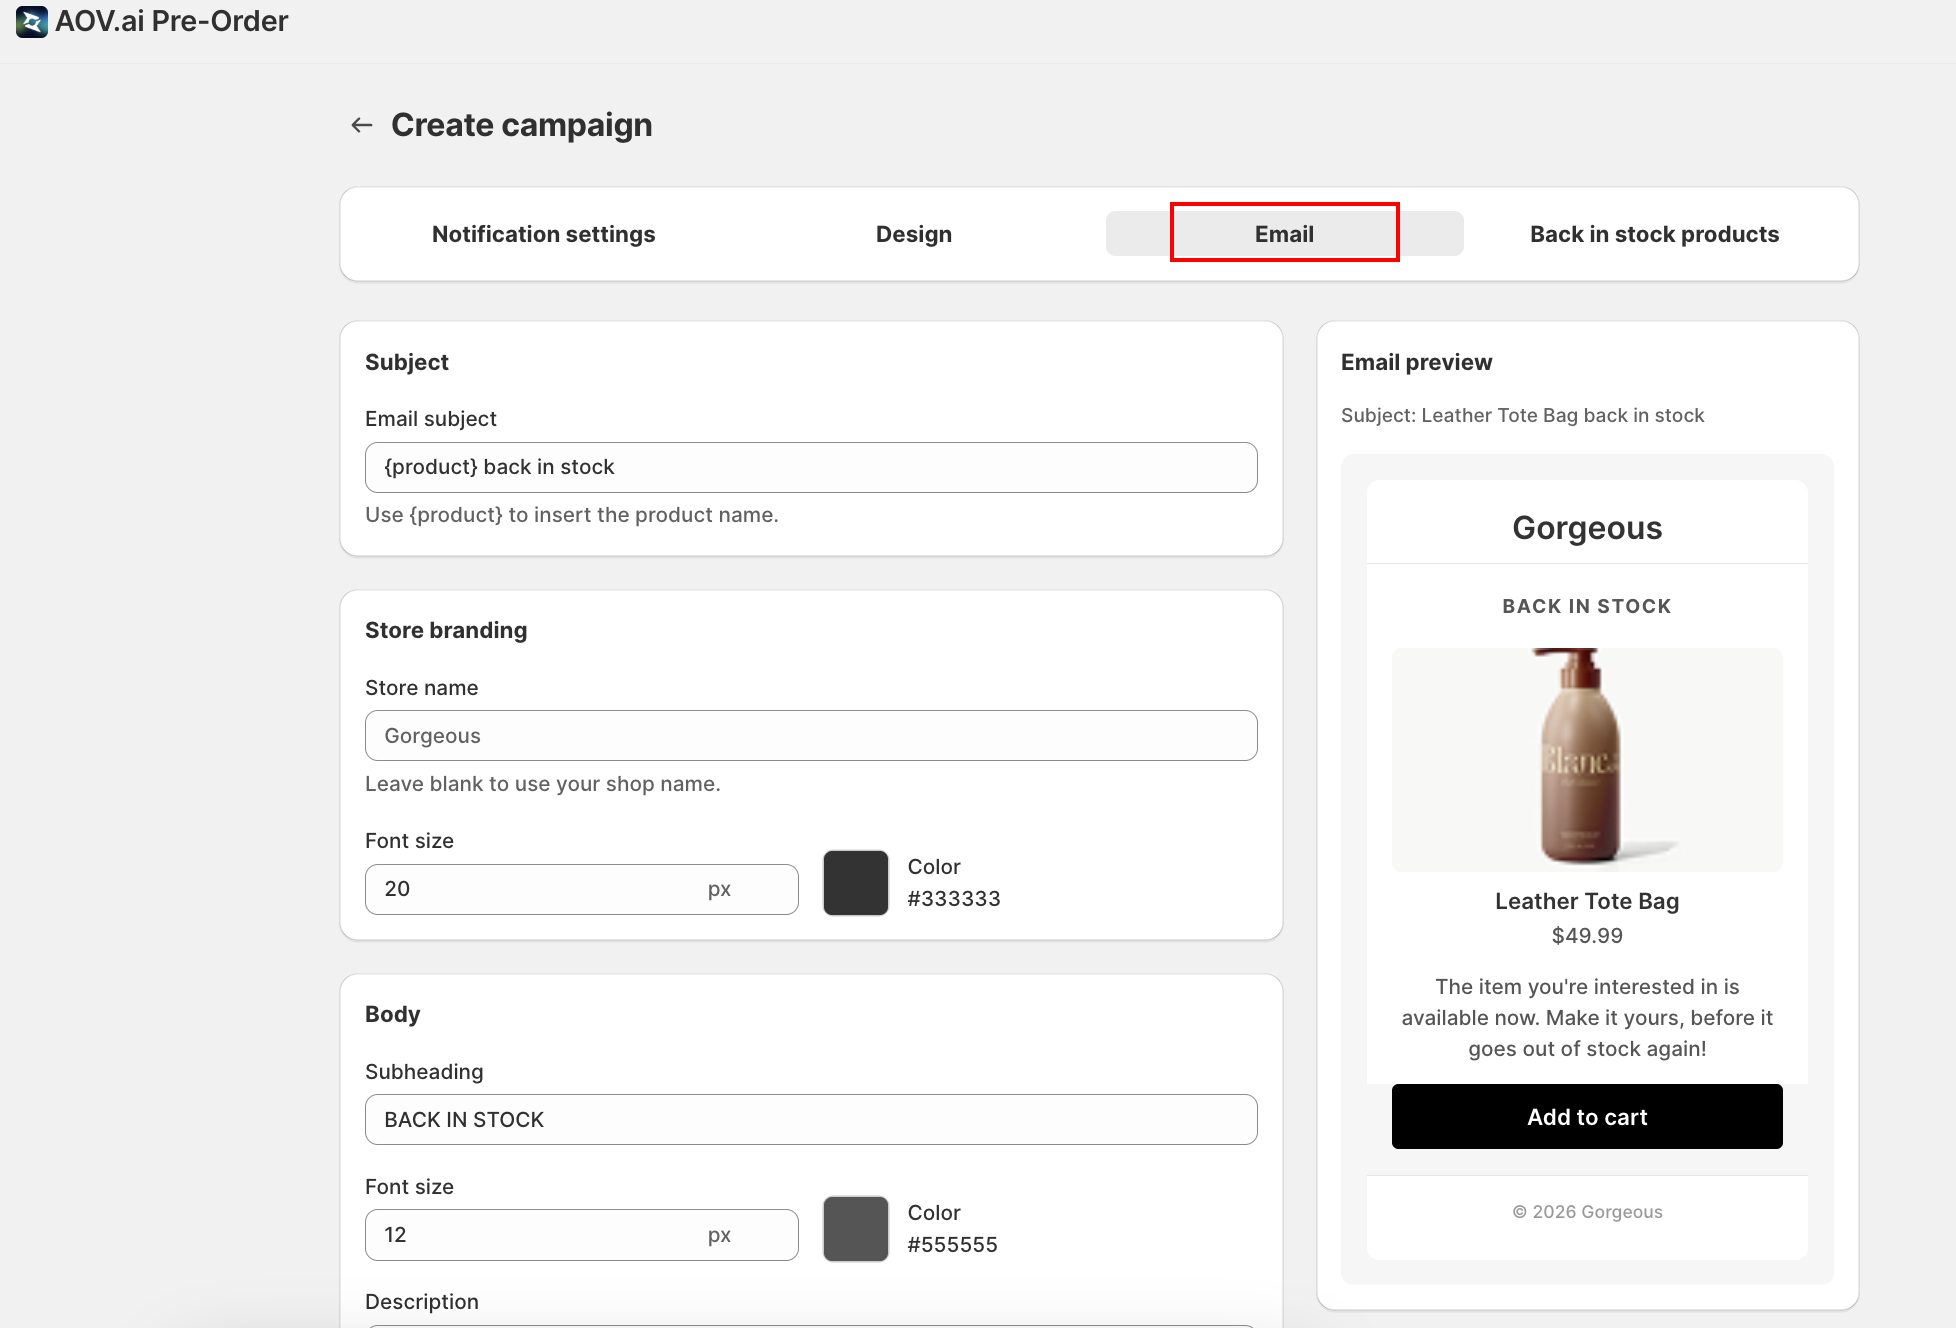
Subject
- Email subject: default
{product} back in stock. The{product}variable is replaced with the actual product name.
Store branding
- Store name: leave blank to use your shop name. Font size and color configurable.
Body
- Subheading: default
BACK IN STOCK(small label above the product card). - Description: default
The item you're interested in is available now.
Call to action
- Button text: default
Add to cart. The button links to the product page. - Button font size and Button color: configurable.
Variables {product} and {shop_name} are supported in the Email subject and Description.
Step 5: Back in stock products (Tab 4)
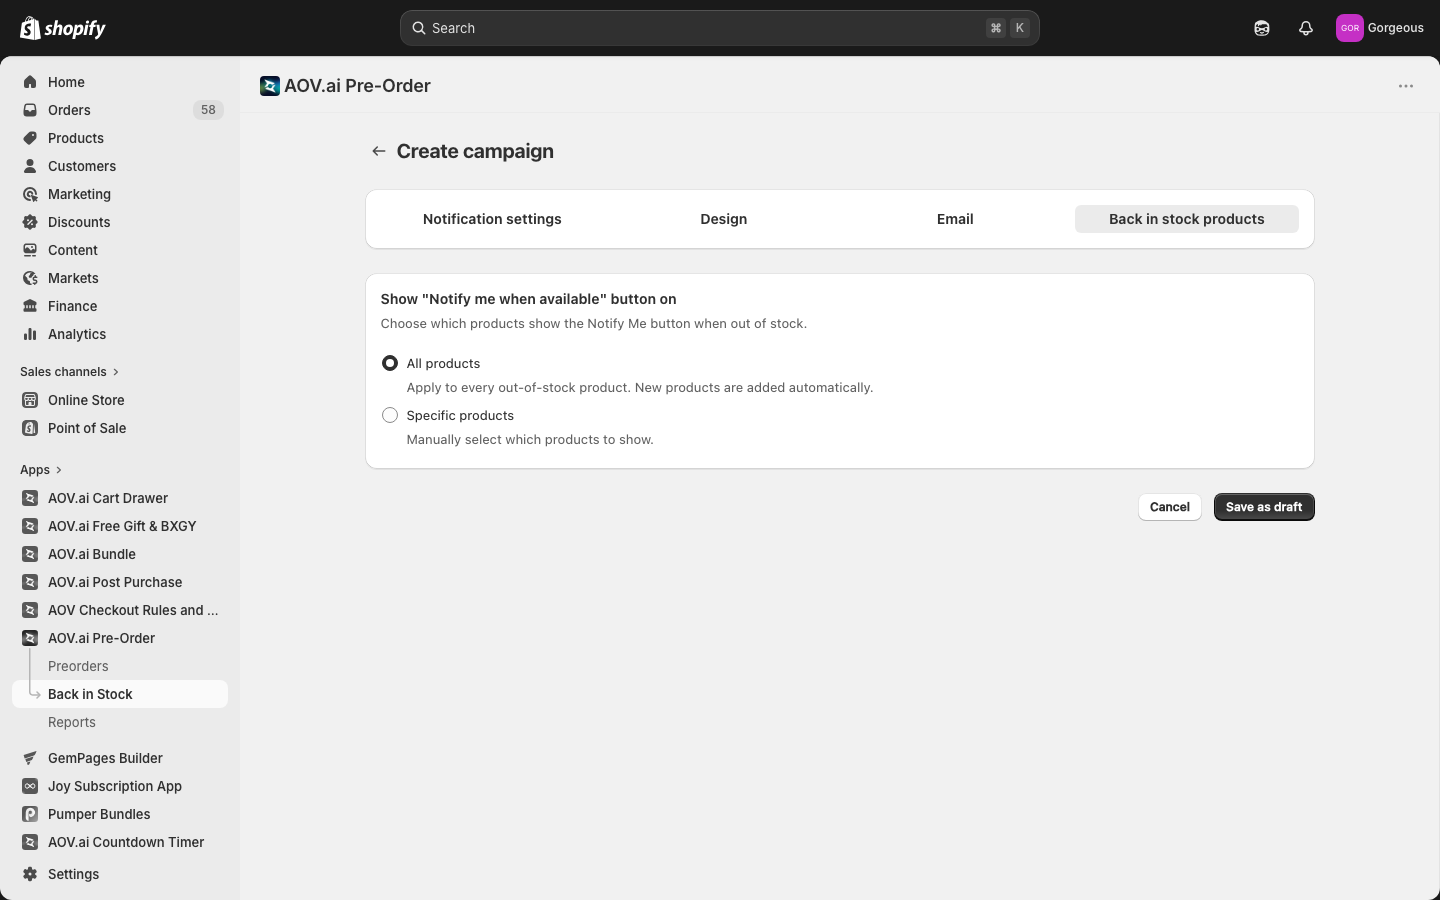
Pick which products show the Notify Me button when out of stock.
- All products (default): every out-of-stock product gets the button. New products are added automatically as you add them to your store.
- Specific products: hand-pick which products to cover. Click Add products to open the Shopify product picker.
When you select Specific products, a table shows each chosen product with a thumbnail, name, and inventory badge (Out of stock / X in stock). Use the trash icon on each row to remove a product.
Step 6: Save and publish
Click Save as draft at the bottom of the page to save without going live. To activate the campaign, click Publish (top right of the page). The button label changes to Unpublish once published.
A Status badge on the campaign list shows whether each campaign is Published or Draft. Only published campaigns render the Notify Me button on the storefront.
If a product is included in both a Specific products campaign and an All products campaign, the specific one wins. Use this to override the global campaign for individual products.
FAQs
Does the Notify Me button replace the Pre-Order button?
No. The two features run independently. If a product belongs to an active Pre-Order campaign, customers see Pre-Order instead of Add to Cart. Back in Stock only fires when the variant is out of stock and the product is not actively pre-orderable.
What if a customer subscribes more than once?
The app deduplicates by email + product + variant. A second subscribe call returns success without creating a duplicate row, so the customer only gets one email per restock.
How fast does the email send after I restock?
In Send automatically mode, the app reacts to Shopify's product update webhook and queues emails as soon as inventory crosses the threshold you set. Sends happen in batches; typical delivery is within a few minutes.
Where do I see who subscribed?
Go to AOV.ai Pre-Order > Reports > Notifications. See Subscribers (opens in a new tab) for the full guide.
Next: Manage campaigns (opens in a new tab) or Subscribers report (opens in a new tab).