Display Settings
Step 3 of the campaign wizard: customize the pre-order button, badge, and messages on your storefront.
How to set up
From the campaign wizard, navigate to Step 3: Display. Customize how the pre-order experience looks on your storefront.
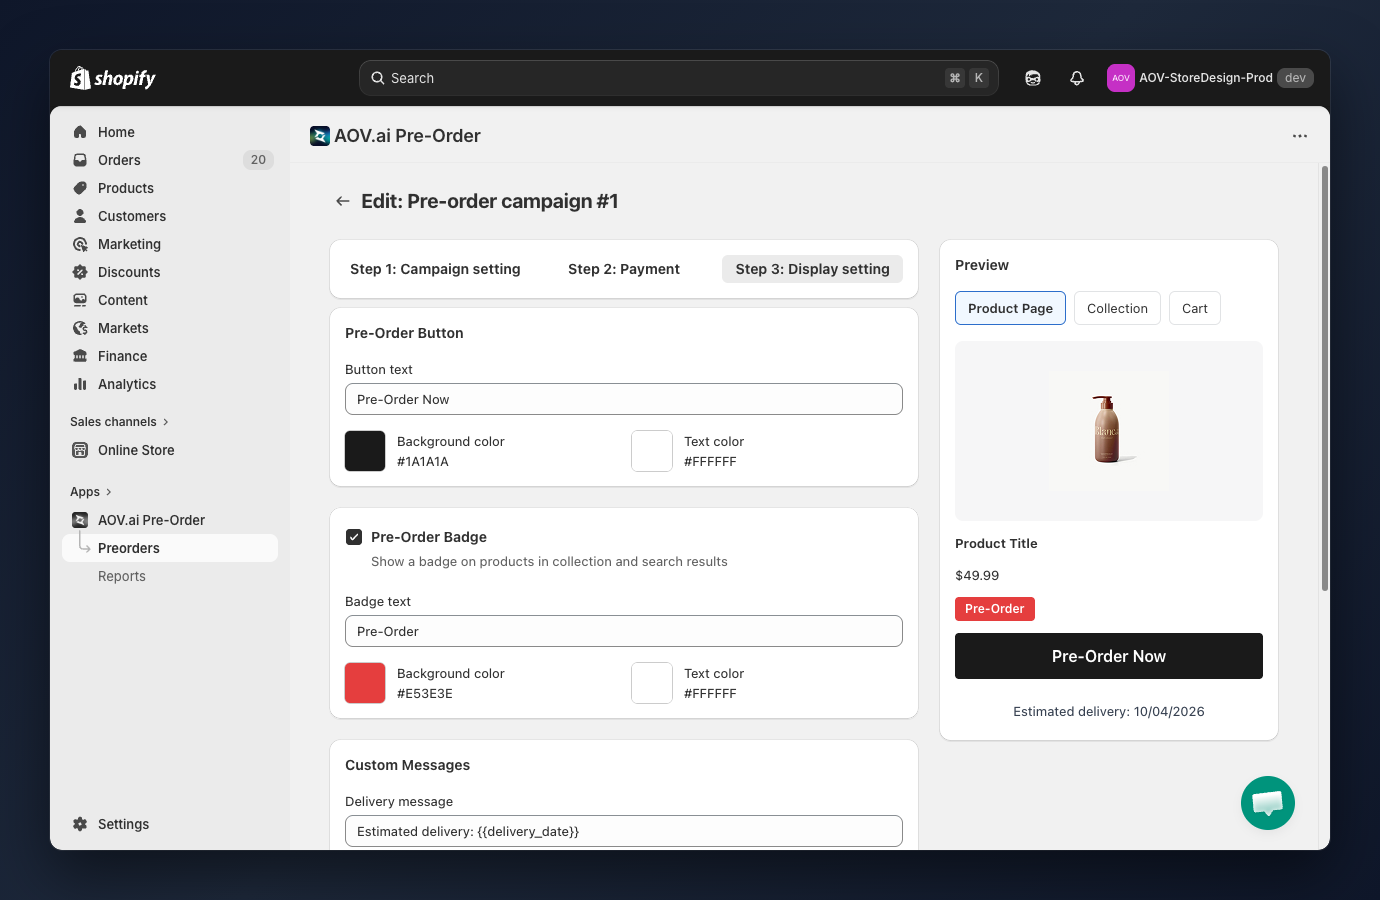
Set the button text
In the Pre-Order Button card:
- Button text: the label shown on the pre-order button that replaces "Add to Cart". Placeholder:
Pre-Order Now.- Other examples:
Reserve Now,Get it First,Pre-Order.
- Other examples:
Choose button colors
Below the button text, two color pickers control the button look:
- Background color: click the color swatch to open the picker.
- Text color: click the color swatch to open the picker.
Tip: Match the button colors to your store theme for a cohesive look. If you enabled Sync theme color in Pre-Order Settings, a banner under the preview offers a one-click "Sync theme color" action.
Enable Pre-Order badge
The Pre-Order Badge card starts with a checkbox labeled "Pre-Order Badge" with help text "Show a badge on products in collection and search results".
When checked, the badge configuration appears:
- Badge text: placeholder
Pre-Order. - Background color and Text color: same color pickers as the button.
Unchecking the box hides the badge configuration and removes the badge from product cards.
The badge is only visible when the app embed is activated in your theme. Go to Online Store > Themes > Customize > App embeds and enable AOV Preorder.
Edit the delivery message
In the Custom Messages card:
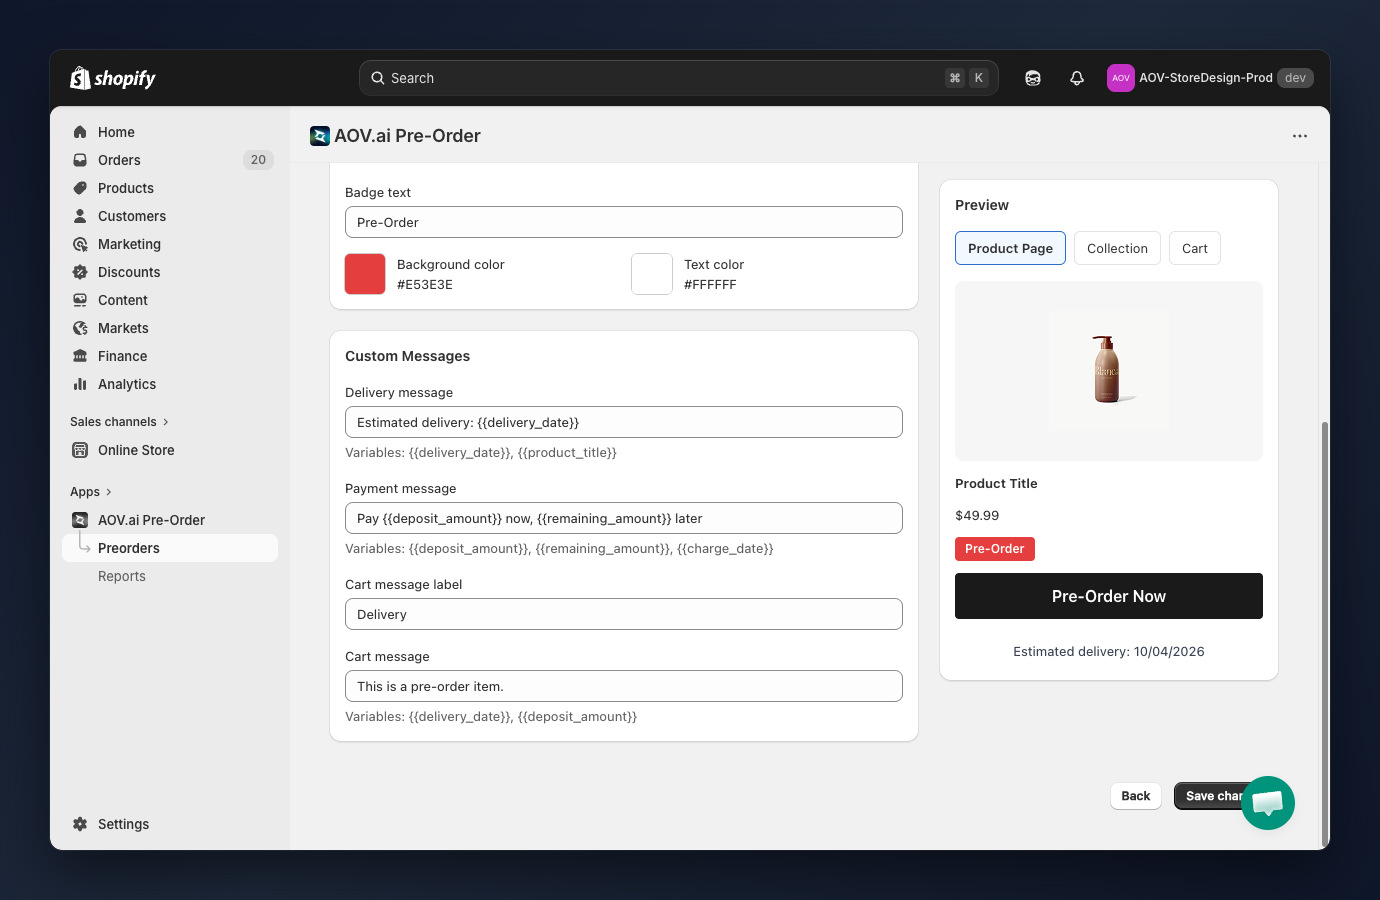
- Delivery message: shown below the pre-order button on the product page. Placeholder:
Estimated delivery: {{delivery_date}}. Supported variables:{{delivery_date}},{{product_title}}.
Edit the payment message
- Payment message: shown when partial payment is enabled, indicating deposit terms. Placeholder:
Pay {{deposit_amount}} now, {{remaining_amount}} later. Supported variables:{{deposit_amount}},{{remaining_amount}},{{charge_date}}.
Edit the cart messages
Two fields control how pre-order items appear in the cart:
- Cart message label: the property label shown on the left side of the cart line item. Placeholder:
Delivery. - Cart message: the value shown next to that label for pre-order line items. Placeholder:
This is a pre-order item. {{delivery_date}}. Supported variables:{{delivery_date}},{{deposit_amount}}.
Tip: Variables like {{delivery_date}} are automatically replaced with the campaign's values. They are preserved across all languages when using translations.
Preview and save
The Preview panel (right side) updates in real time. Switch between:
- Product Page: button with custom text/colors, badge, delivery message, payment message
- Collection: product card with badge overlay
- Cart: cart line item with delivery note
When everything looks good, click Save (for a new campaign) or Save changes (when editing) at the bottom of the page. A contextual save bar at the top also offers Save and Discard while you have unsaved changes.
After saving, make sure the app embed is activated in your Shopify theme. Go to Online Store > Themes > Customize > App embeds and enable AOV Preorder.
Supported variables reference
| Variable | Where used | Description | Example output |
|---|---|---|---|
{{delivery_date}} | Delivery message, Cart message | Delivery date from Step 1 | 10/04/2026 |
{{product_title}} | Delivery message | Product name | Summer Dress |
{{deposit_amount}} | Payment message, Cart message | Deposit amount | $20.00 or 20% |
{{remaining_amount}} | Payment message | Remaining balance | $80.00 or 80% |
{{charge_date}} | Payment message | Date remaining balance is due | 05/01/2026 |
Click Back to return to Payment Settings (opens in a new tab).